My original draft of this Post-Mortem was a mess. I was tired, the train was loud, and I had just finished doing some tweaks for a GameTextures Gift Guide that I hope will make it out by the end of the week. Needless to say, this post-mortem was awful.
Today, as I start my new draft, I’m rested and ready to rock. I have mixed feelings about this project for sure, I feel that I didn’t completely hit the quality bar I wanted to when I set out to create my trenches, but now that I’m a bit more rested and relaxed, I can see the forest and the trees. The most important thing about this project is that I got it done and learned what I can manage on my commute.
Let’s get into it.
Project Overview: Trench Kit

This project was based on a class assignment I gave my students at Drexel University during the Spring Quarter of 2018. I wanted them to be challenged by something out of left field and I didn’t want to keep shoving variations on a still life down their throats. So, I created this assignment.
It was a huge hit
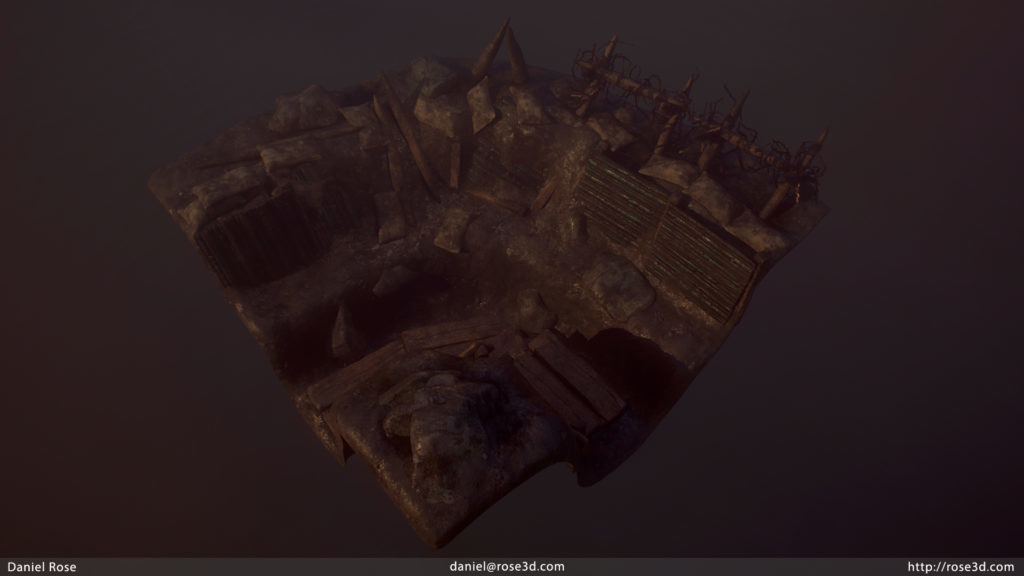
After I finished the critique and grading period, I wanted to do a version of The Trench as well. My goal was to turn this into a kit of parts that could be sold on Sketchfab. With all of the different storefronts that exist, I wanted to keep a narrow focus and selected Sketchfab to be my storefront of choice, mostly due to expected time constraints related to starting my current job. I took the blockout I did for my students, added to it, and began work on my trench kit.
By the end of the project, I had created 5 FBX ‘prefabs’ that I could ‘jam’ together in an engine. There was a lot that didn’t turn out the way I had intended, but instead of restarting the project like I would have in the past, I pushed through and finished it. This was a start to finish with no re-work project.
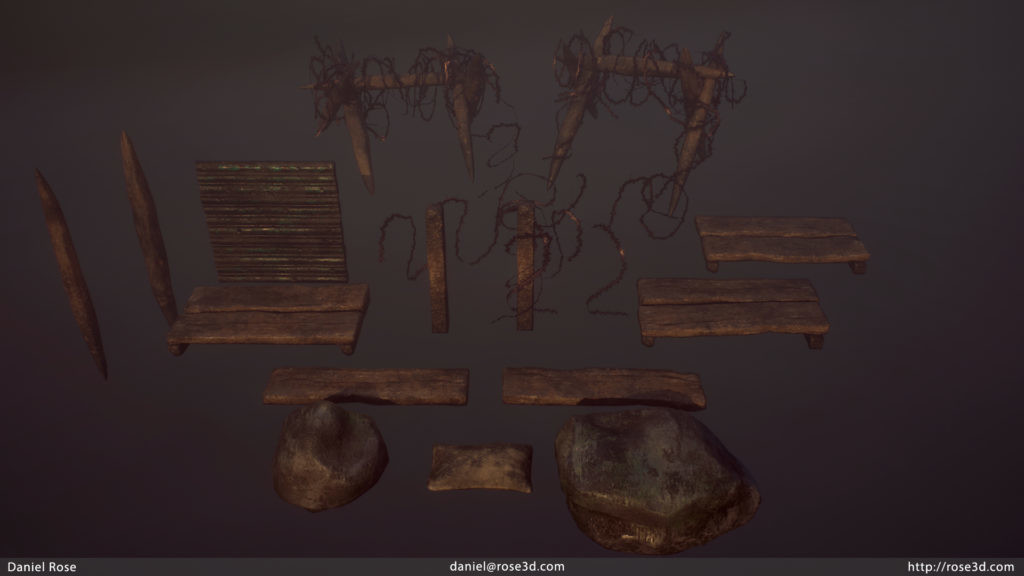
I’ve lightly modified my storefront plans due to how the project turned out; I’ll host my models on Artstation and SketchFab with my Substance files (SBSAR and SBS) being made available as well, but the terrain pieces will not be made available as they just don’t work as intended and realistically, wouldn’t be used in most games like this anyway..
This was also the first project I completed using my laptop on my commute. Only a handful of render stills were captured while I was home (still on the laptop). This was a great lesson in working within a limited daily time frame in a less than ideal setting.
This project wasn’t everything I wanted it to be, but it provided a lot of valuable insights into how I need to handle projects moving forward. I learned a few new things along the way too.

What Went Right
Working on my Commute
I bought my laptop specifically to use to work on my commute. The first two months or so after I started work at DreamLine, I spent my commutes trying to write on my old Galaxy Tab 3 or playing my Playstation Vita. While that was all well and good, I couldn’t find time to work on my own projects. My time constraints during the week were too great, and I am basically shut down on the weekends. My weekday starts at 4:30 AM with lifting and ends at 9:30 or 10:00 PM. This is a 16+ hour day, and between my job and my art I probably work 12-13 hours of a given day, so I need the weekends to relax. A laptop was the only way I was going to find time to work on projects during the week.
This has proven to be a huge success. There are challenges involved with trying to make art on a train, but the fact that I am able to is a huge win overall. Clawing back 2 hours a day for me to work has been invaluable to my happiness.
My Substance Workflow
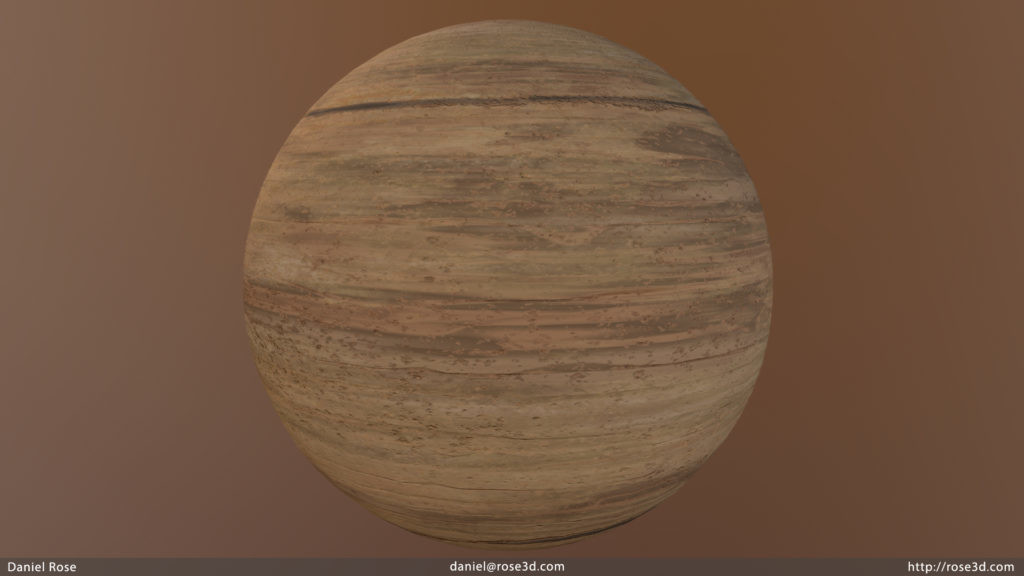
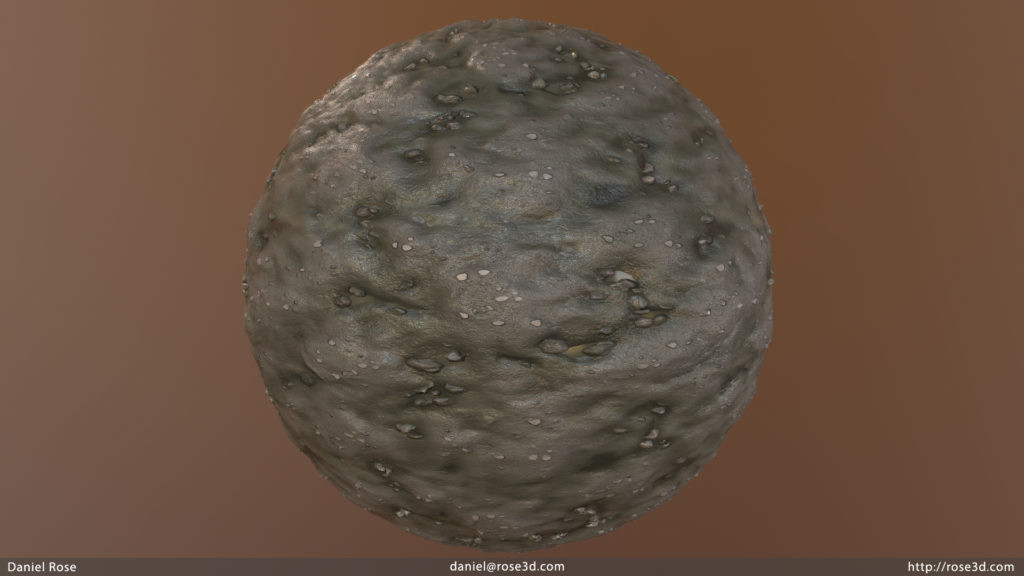
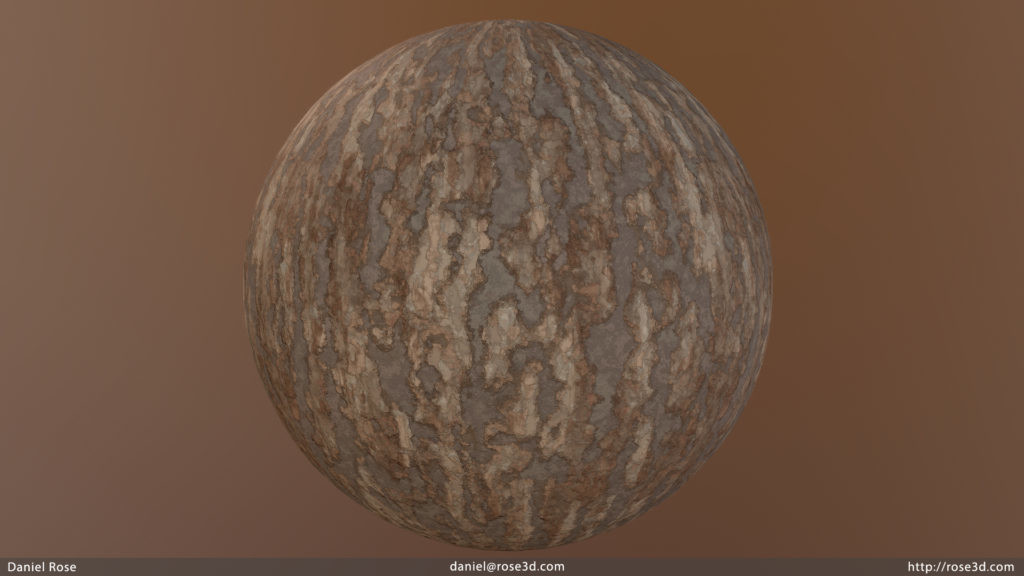
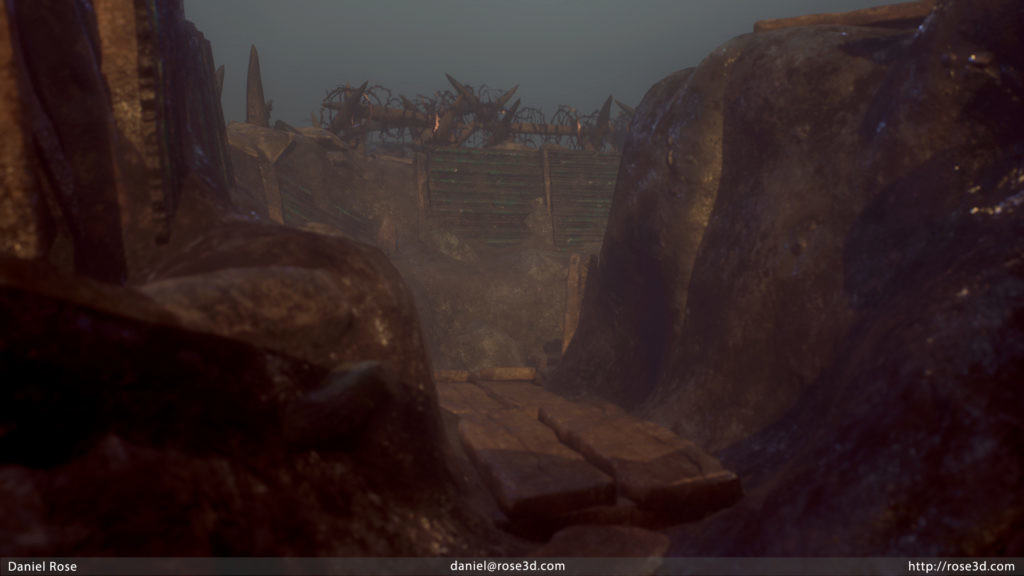
They might not be perfect (ok, they aren’t), but I’m getting the hang of making complex Substances and doing fully featured integrations with Painter. I wanted to make everything myself for this project and I did, with the barbed wire and the corrugated metal being the only exceptions. Having limited time means I needed to work smart and using the Substance Workflow I did was key.
Once I made my Substances in Designer (one of the more time consuming aspects of this project), I moved them over into Substance Painter using the SBSAR format. Thanks to some of the work I have doing at DreamLine, I stated exposing parameters too (although later in the project). With a mix of exposed parameters, an easy re-import process, and a few custom masks made from exported maps, I was able to quickly and easily texture the majority of my assets. This also furthered my goals of using both programs more and has left me feeling more confident in my usage of the core Substance tool kit. I think my overall material work was a high point of this project, even if the individual materials could use improvement. Never underestimate visual consistency.
Alternatives
When I started, I initially set out to use Sketchfab as my main platform of choice for everything. I don’t often connect to the internet on my commute (I like to save cash when I can) and when I do, I don’t like to upload files. So, to check the quality and validity of my work, I would import it to Marmoset Toolbag 3.
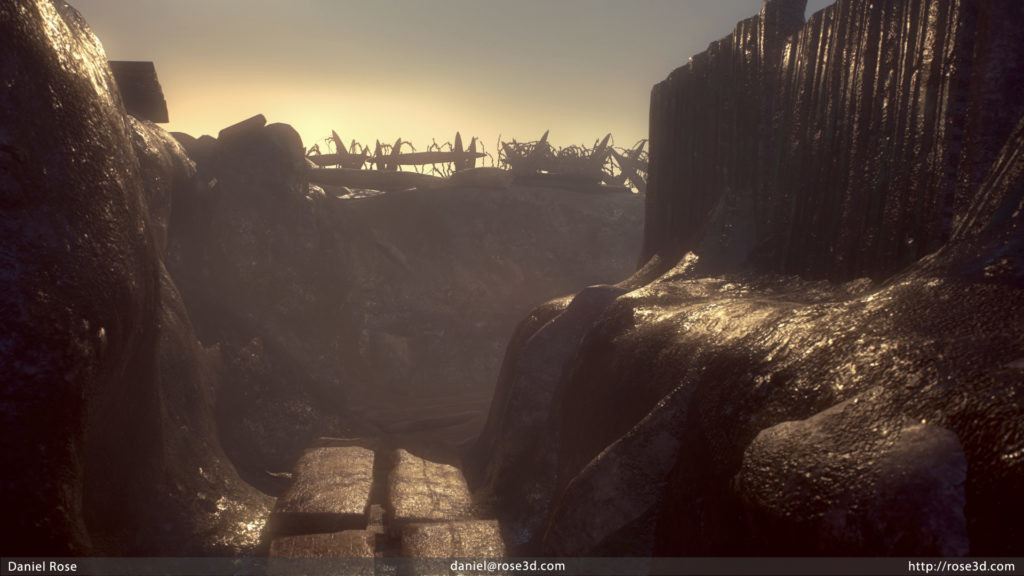
Once I started using Toolbag, I didn’t stop. With it’s bevy of rendering features (Who DOESN’T love VXGI) and ease of use, I decided to adopt it as my primary renderer and to only upload a single, chosen trench prefab to SketchFab. I think this turned out great, as my renders from Toolbag look pretty dope all things considered. Sketchfab has some limitations that Toolbag doesn’t, and although using the full set of rendering features on my laptop killed my battery on my commutes, It was well worth it.
My other big “alternative” was my adoption of Krita. I have been a Photoshop user my entire life, but with my Laptop and goals to cut costs personally and professionally, I needed some sort of alternative. When I stopped to think about my workflow, it became pretty clear that having the full set of Photoshop bells and whistles was useless-Substance handles most of my needs there. But for image editing and some resizing, I needed SOMETHING.
Arvin Villapando, one of the early staffers of GameTextures, suggested Krita. He has a love of using early, free, or beta software and he was a big fan of Krita. I decided to use it for this project and I very much enjoyed it (and 4.1.5 has a nice face lift too). It does pretty much everything Photoshop does in regards to my type of art, just in a slightly different way (and for much less money).
What Went Wrong

Land of Terrain Confusion
Generally speaking, this wouldn’t be an issue. In Unreal, Unity, or other game engines where I would have more control over materials, I would build a material that had different blending options I could control, and blend a number of tiling textures. Even if I chose to use kit parts as they are, it would have worked fine.
As far as I know, Sketchfab would not have supported this, and Marmoset was equally limited (at least out of the box). I made the choice to uniquely unwrap my little terrain models and texture them individually in Painter. This would have made them more appealing overall because I could blend between different materials.
It worked…but…it didn’t make for a production ready asset. No one should realistically use my terrain models as is, and even less so with their 4K texture sets. Plus, the models don’t truly snap because I sculpted each terrain mesh in Zbrush. They connect OK, but the mesh separation is pretty obvious and without more blending via models or a Decal set, it just doesn’t look right.
I usually consider terrain work a strength of mine as it was modeled in the fire of hand modeling it for Uncharted: Golden Abyss and Shadow of The Colossus (though to a lesser degree). In this case, it was one of the weaker aspects of my project.

Not Keeping it Small
Compared to the other projects I’ve done, this really was pretty small. That doesn’t mean I handled it properly. Instead of keeping it to a small, single diorama piece, I expanded it to a mini environment with multiple shots. This took away from other work I could have done (more assets to really sell the trench) to make for a stronger, more focused piece. This is an inverse of the trap that many artists fall into, where you have a grand idea that is *hopefully* cut down to a manageable project. I made the opposite mistake and I believe it takes away from what I delivered.
Working on My Commute
While being able to work on my commute is great, there are many aspects of it that caused issues. There isn’t a lot to expand on here so I’m going to present it in an outline format.
- A few times during the week I was too exhausted to work.
- I lost two…TWO! Intous Pro Pen 2’s.
- My tablet has an odd bluetooth issue where tracking gets poor pretty quickly only to be fixed by moving the pen away from the tablet. Apparently this is a Train Only Feature.
- An inability to get into and maintain ‘flow’ for more than 30 minutes.
- I’m limited to a single 1080P screen, which makes checking reference cumbersome.
- When the train goes fast (usually in the evenings) I often have to stop until it slows due to jerkiness.
- Zbrush performance is mixed because it won’t switch over to my Nvidia GPU.
- I’m often a bit cramped.
Moving forward with the lessons learned
With the project complete, although not quite as I imagined it, I’m left with many lessons to take into my projects in 2019, which will be a pretty big year in terms of changes to my core software choices. But I’ll leave that for my 2018 wrap up.
I need to work on significantly smaller art projects moving forward. While my laptop has proven invaluable to getting work done on the train, the limited time frame and my long days in conjunction with being on a train means that I am prone to burnout, exhaustion, and frustration. Projects with long time horizons, foreseen or not, do not work in that setting.
As long as this commute is the norm, I would expect to see me output more singular props or Substance Material Spheres than fully featured environments or even dioramas. Fully featured asset packs are likely out too, as the time required to properly set them up and make them live on stores is more time I don’t have. I still have to do that for this project but I am burnt toast with a lot more on my plate still.
I need to make SBSAR’s the cornerstone of my workflow. I didn’t properly get into SBSAR’s until towards the end of this project. They will save me a boat load of time AND be infinitely re-usable as I build a personal library of materials. I know that using GameTextures or Substance Share can properly help me make assets faster, but I love building out materials in Designer and having a solid understanding of the tool will make me significantly more employable in the future.
Marmoset 3.05 is here to stay. I love Unreal, but I’ll be using it for other experiments right now since I use it at work. Marmoset does exactly what I need to display my work in a timely manner. I know it’s capable of more than I used it for this time around too and I can’t wait to dig into it a bit more.
Pushing this project through was the right choice. Sometimes game developers push a game out before it’s done. Schedules, time, and money can get in the way of taking that extra time to polish up a project and make it truly perfect. It’s up to the developers to figure out what the best course of action is in those situations. Do you delay and eat the cost at the expense of team morale and potential payments? Do you ship, hoping to update the project enough that it’ll be respectable quickly? Do you say “here it is, we’re done” and move on to something new and better?
I made a bad call with how the terrain was handled, but for once in my personal 3D Artist life I pushed through and just banged the work out. It’s flawed but it severed a bigger purpose to me. It proved that working on the train CAN WORK and I can continue to push my skills to their limits.
-Dan